
The 7 Most Important Tips for Taking Good Dance Photos
As dancers we spend hours upon hours training to have the technical, physical and mental skills required to be able to perform our best and master our artform whether it be ballet, ballroom, commercial or jazz. And whilst dancing itself is the perfect reward, as passionate performers… we also love being able to show off these talents to a willing audience. Sometimes though, performances can be few and far between (thanks COVID), or perhaps you need more content for your personal branding, or just want to have a lasting keepsake of what you have been able to achieve through hard work, practice and perseverance. Whatever the case, dance photos and dance photography are a dedicated artform all of their own, and one that has its own unique set of skills and techniques in order to master ‘the perfect shot’. If you’ve clicked on this article hoping to find some tips and techniques to help you make your dance photos shine (whether you’re the photographer or the subject) then you’re in luck! Because that’s exactly what this article is here to do. Read on for our guide to dance photography whatever camera (or phone!) or dance level you’re at.
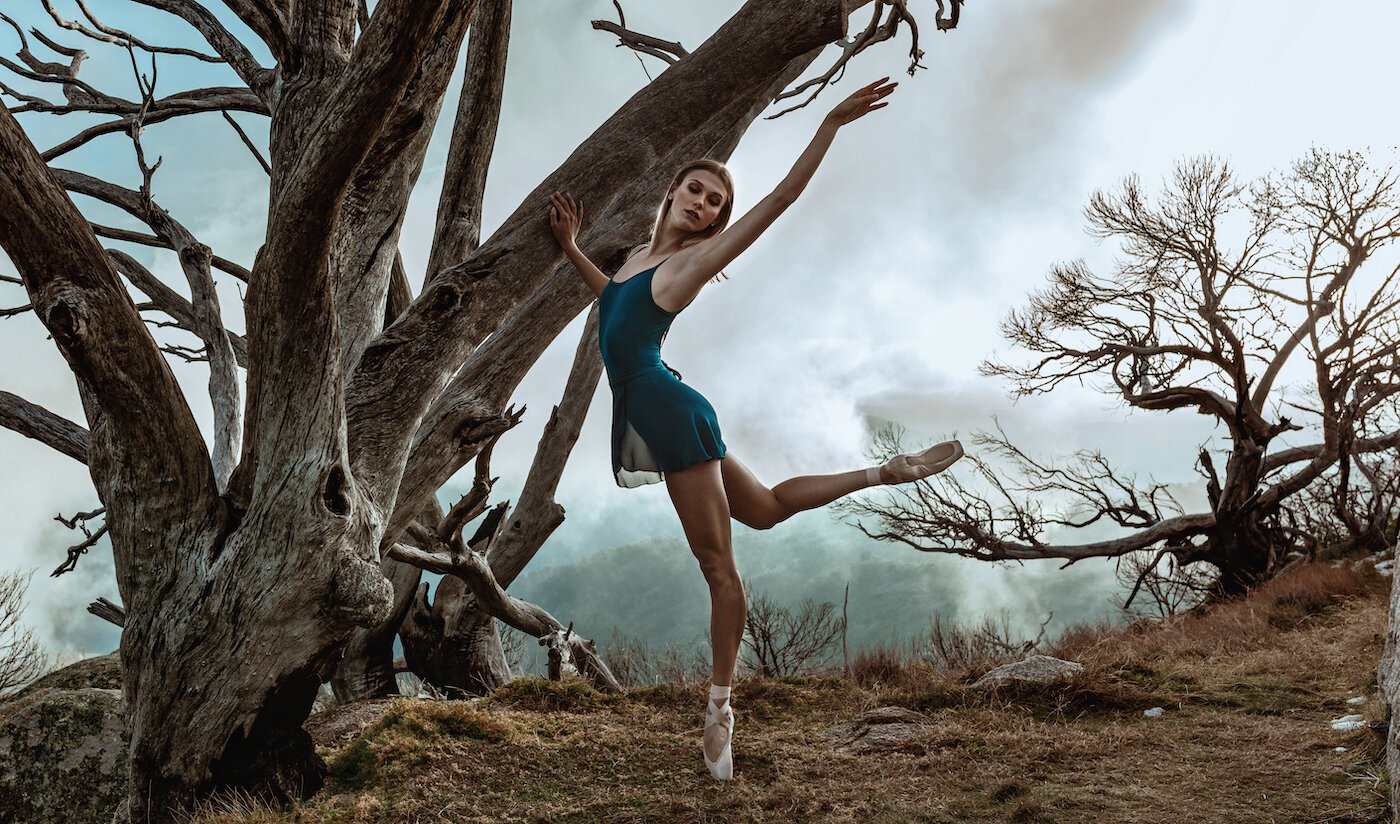
Tip 1. Come prepared.
Whether you’re the one planning to be photographed or the one taking the photos, or both (welcome to the selfie age!), it’s always a good idea to come with ideas and poses in mind. Think about your setting, the style of dance you’re hoping to capture and the mood you want to convey in your photos. If you’re a contemporary dancer, save some of your favourite contemporary poses, search Instagram and pinterest for popular phrases like #contemporarydance and #contemporarydancer or try looking up dance companies or dancers you admire that fit your theme. Sydney Dance Company for example could give you some great inspiration for contemporary poses to try. The same applies for ballet, commercial, urban, jazz, tap, ballroom, salsa, lyrical - you name it! There’s nothing worse than finding the perfect backdrop, having a great outfit and amazing edits for your photos but not being happy with the poses you ended up with! One more tip: if you find a pose that’s really working on the day, don’t just take one photo and move on; make sure you give it several attempts so you’ve got time to improve the framing, technique, angle and everything else. It’s so much easier to make a change and take the shot again in person than it is to spend hours trying to fix or crop something later because it wasn’t ‘quite right’.

Tip 2. Play to your strengths.
This tip is aimed at the photo subject, the dancer, but it also applies to the photographer. Everyone’s talent and skill level is unique, and everyone has things they excel at and things they’re less adept at. Make sure you’re making the most of your photo opportunity by highlighting those things you’re most proud of. If you’re a phenomenal jumper, jeté your heart out. If you have stunning arches and a gorgeous pointe, show that off! If however, flexibility isn’t your strong suit then don’t make that the focus of the photo by trying a split kick in every shot. Not only will it make for a more awkward and uncomfortable look, but you won’t be doing yourself justice. No one is a 10/10 master at EVERYTHING, so take some time to really think about your strengths and make the most of them in every photo. Photographers, you too. If you’re not confident at nailing those night-time shots, keep practicing and don’t give up, but save it for when you’ve got time to play without needing a flawless result, and instead go somewhere you know you’re confident shooting when you need to capture the perfect dance pic. I for instance LOVE my natural light, so you can bet I’ll be photographing my dancers out in the natural sunlight whenever possible.

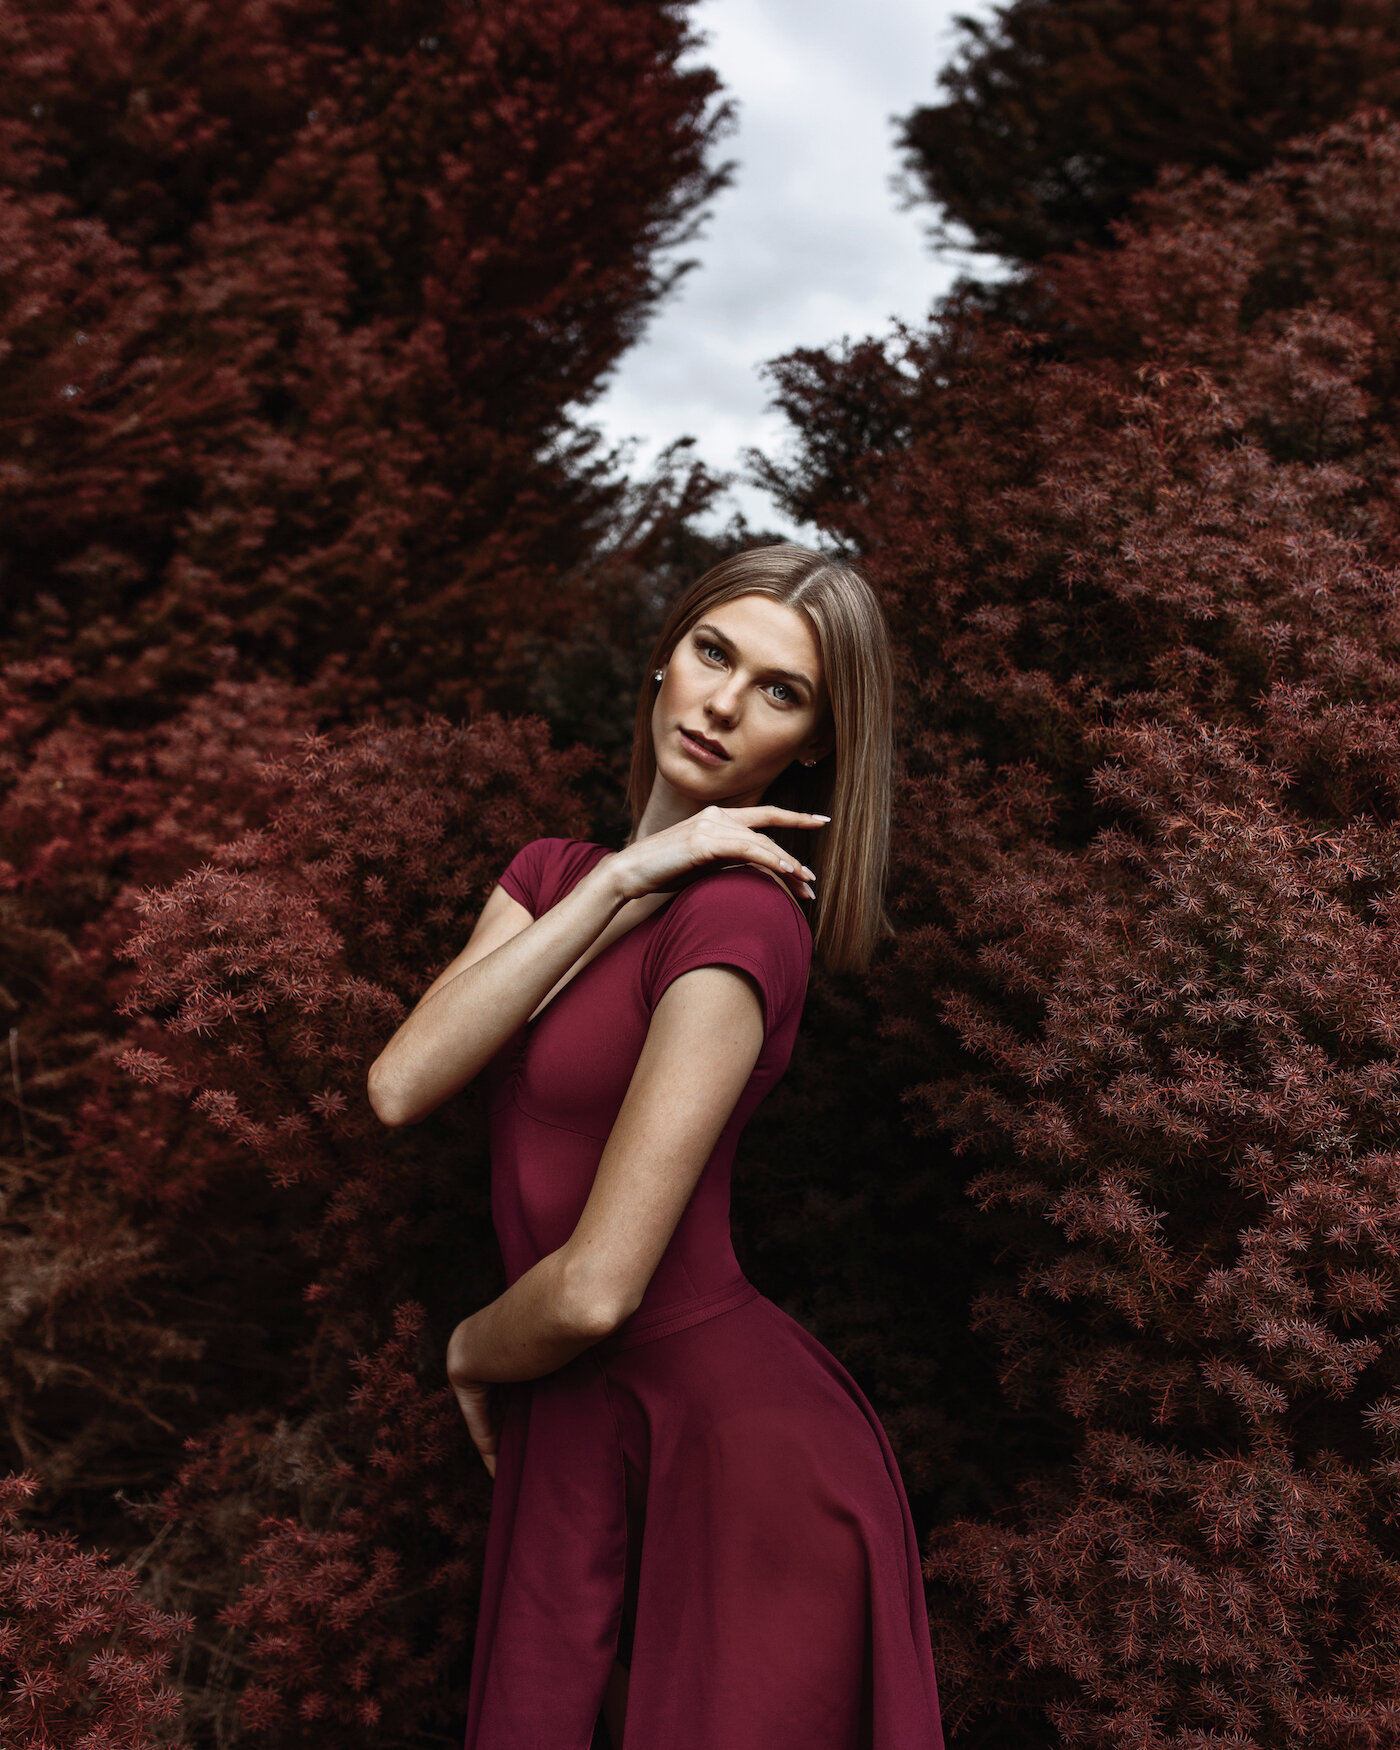
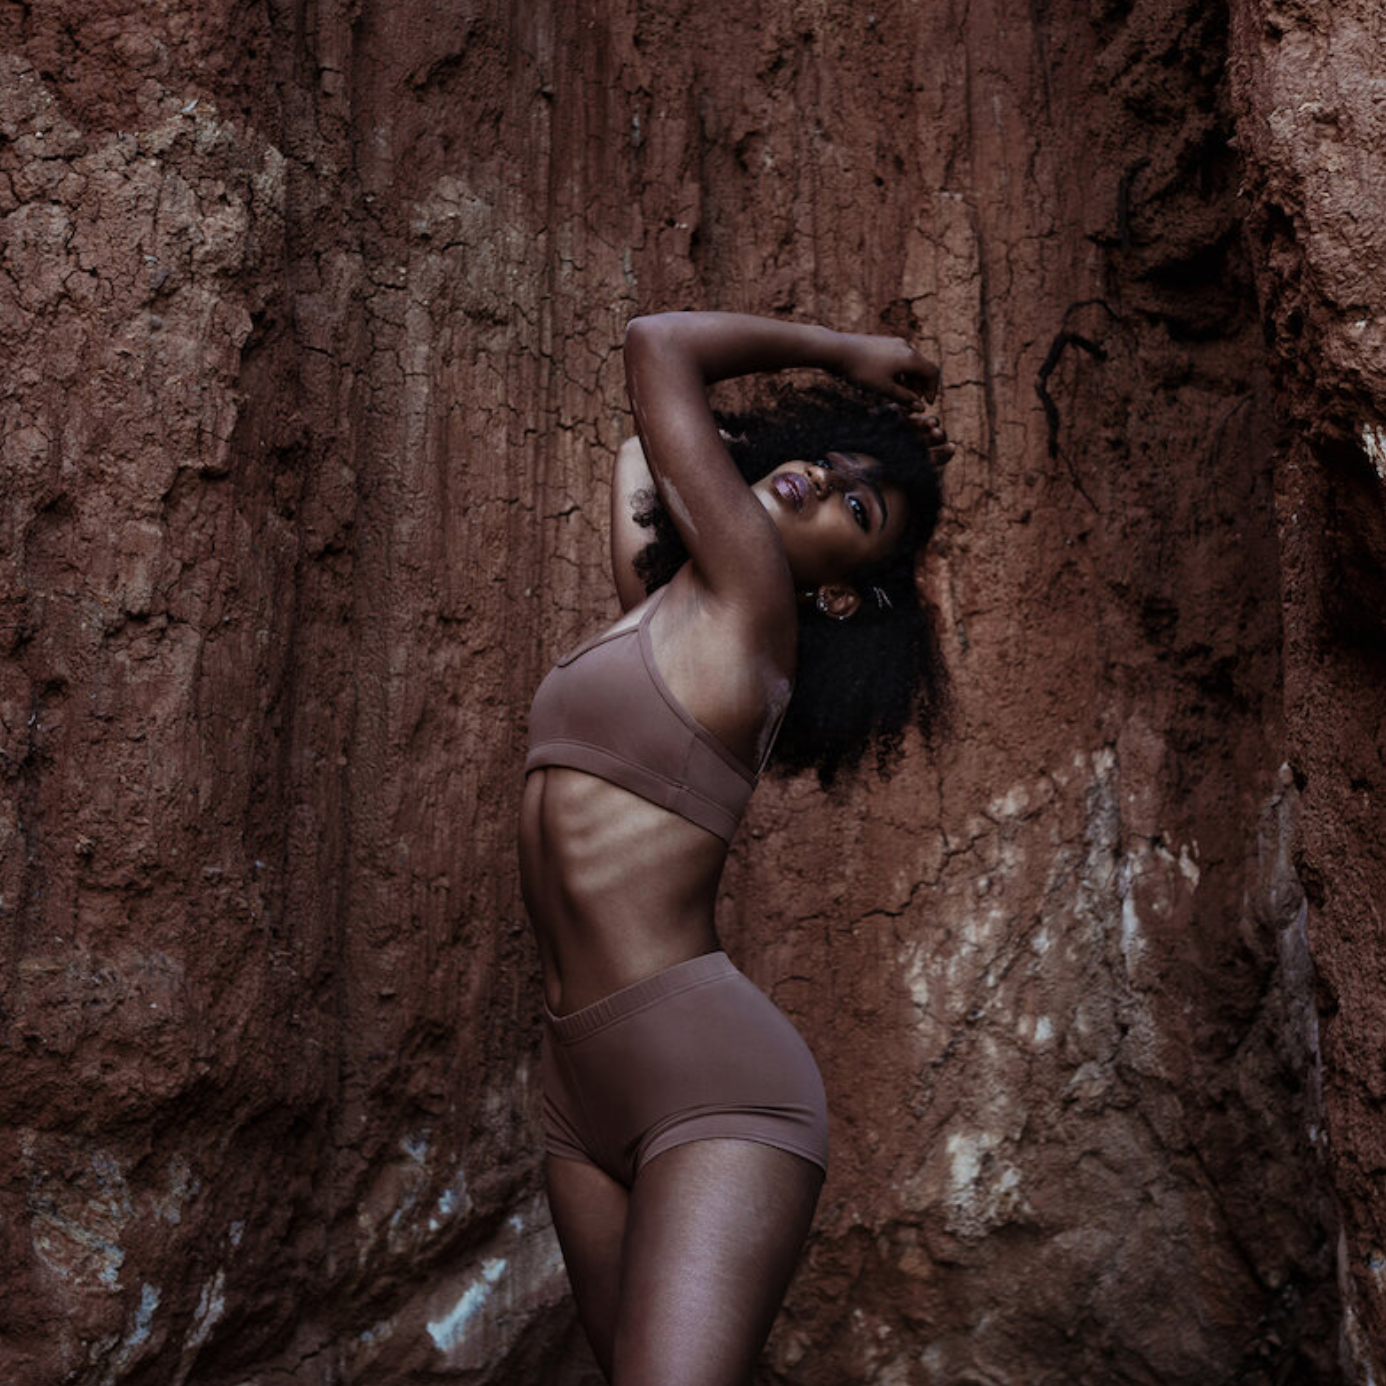
Tip 3. Location, location… location!
This tip is pretty obvious, but I couldn’t write a how-to guide for dance photography without putting something in about the thing that determines SO MUCH of the overall mood and feel of your image. Locations don’t have to be mind-blowing and epic for a photo to be good, they can be, but sometimes the simplest locations make for the best results too. What you need to decide is what kind of setting is going to produce the results you’re wanting from your photo. Looking for something elegant and stylish? Clean, minimal backdrops with less rather than more colour and softer light will do the trick. Wanting moody and atmospheric photos? Try a textured, dark wall, an empty carpark or somewhere urban and opt for overcast weather as opposed to full, bright sun. Epic backdrops do have their place, but make sure they’re not taking over the photo and over-powering your dancer. You want dance to be the main wow-factor in your image, not whatever is behind them. So if you do go for somewhere really bold or busy, really consider how to frame the shot and how to position your subject so they’re not lost in everything going on around them. Time of day plays a big part in this too, a sunset or early morning light can have such a dramatic effect on a photo compared to a bright sunny day, or a stormy, cloud-filled sky, test it out and see for yourself.
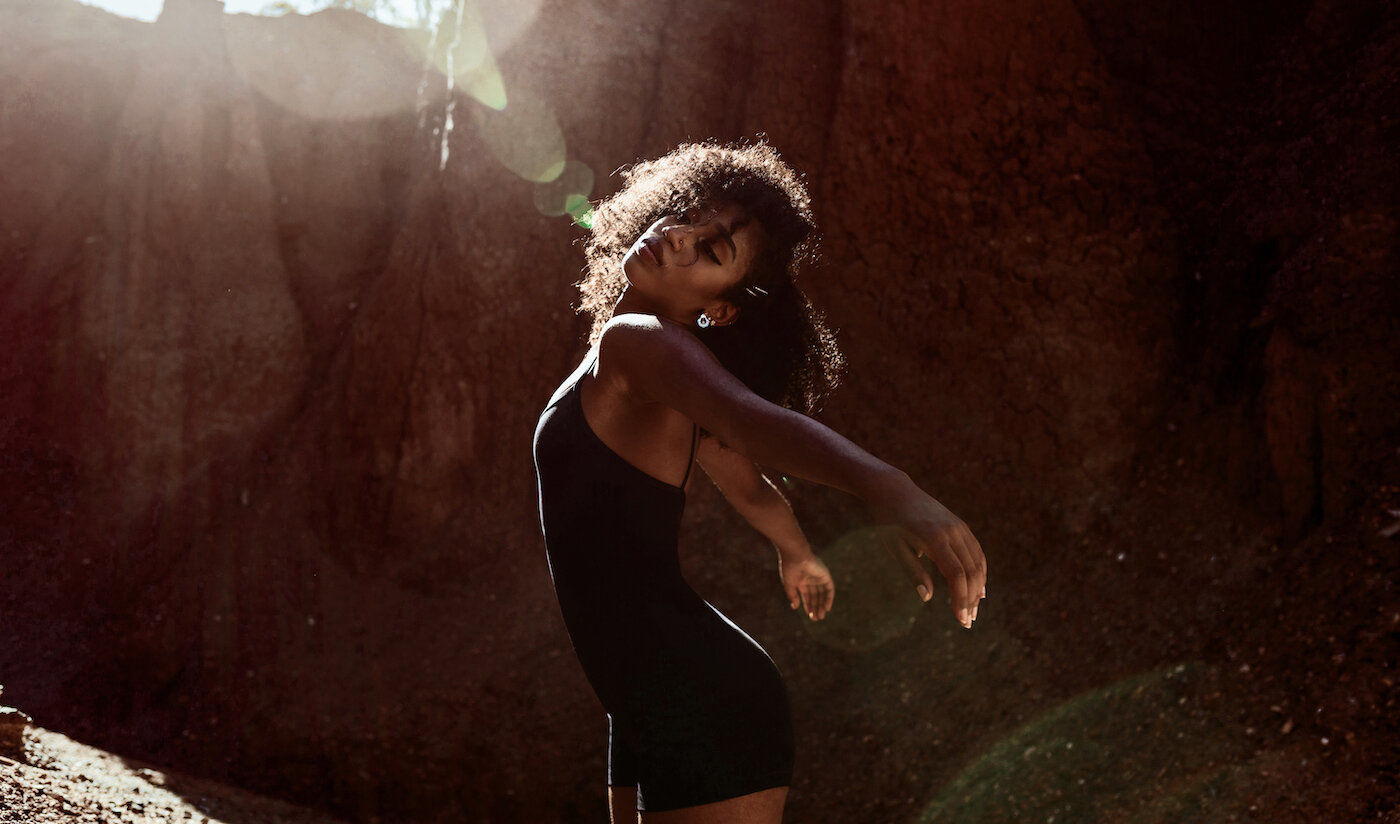
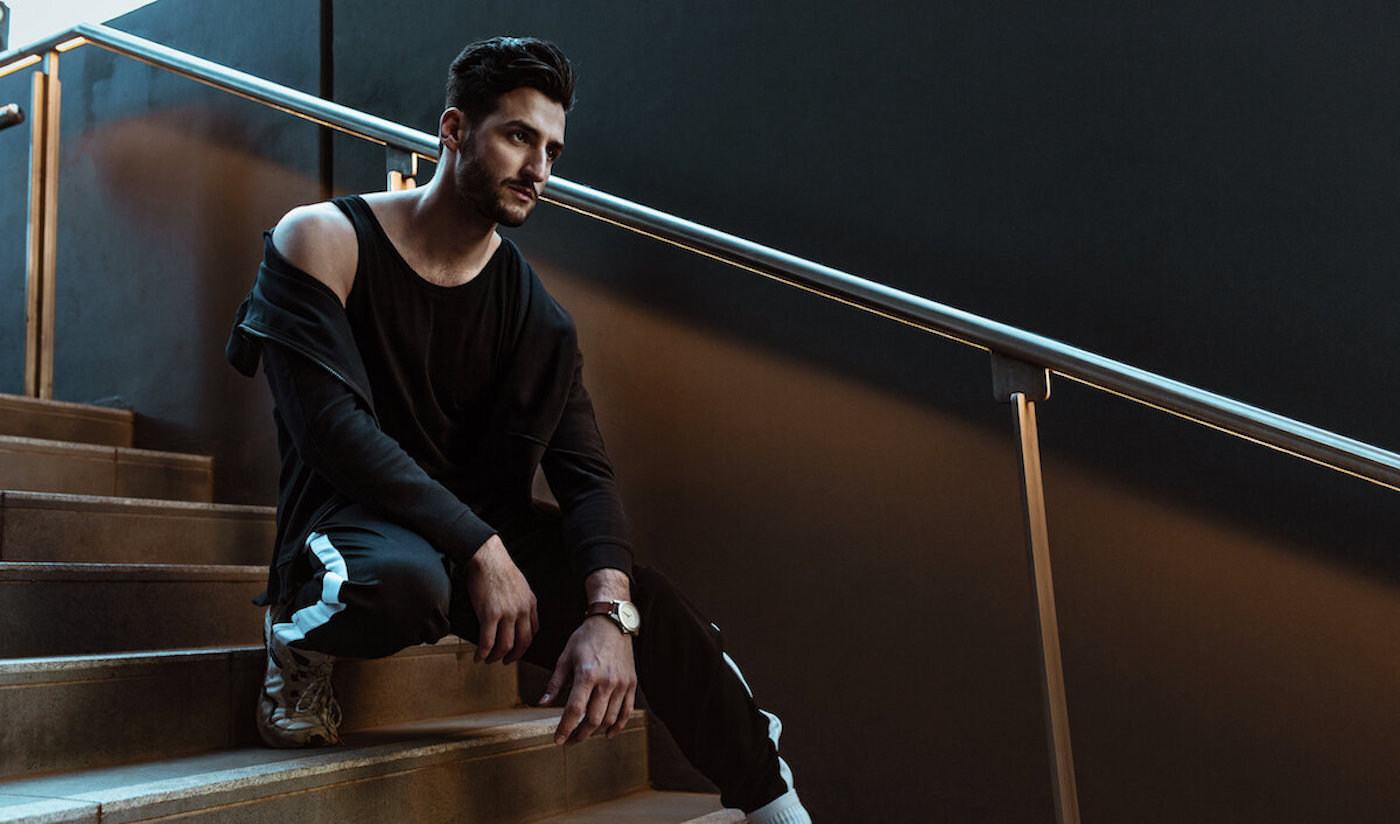
Tip 4. Lighting.
As mentioned above, lighting can make all the difference with how your photos come out. Not just natural sunlight and whether there’s a lot of it or a little, but also where that light is in relation to the photographer and the dancer. Backlit photos (with the light source behind the dancer and furthest from the camera) will create gorgeous halo effects and softer, more muted colours in your image. Images taken in full sun will be bright and clear with colours that pop. Try and avoid shooting with the sun directly overhead though, as this is likely to produce pretty unflattering/harsh shadows on your subject and the background, if you do want full sun, instead go for mid-morning or mid-afternoon photo sessions when the sun is at a much more photo-friendly angle. Low light (dusk and dawn) can give you ethereal, cinematic imagery, and if you’re inside or low on light, artificial light sources like car headlights, car park lighting, a lamp, or even just your phone can create spectacular effects that add new dimension and a completely different feel to your photo’s end result. Always think about where your light source is coming from when taking a photo, and what effect this will have on enhancing or disrupting the look you’re trying to create. Experiment! Move your light around, or if you can’t move it (for instance… the sun), move the camera and the dancer around in relation to the light and see how much your photo changes!
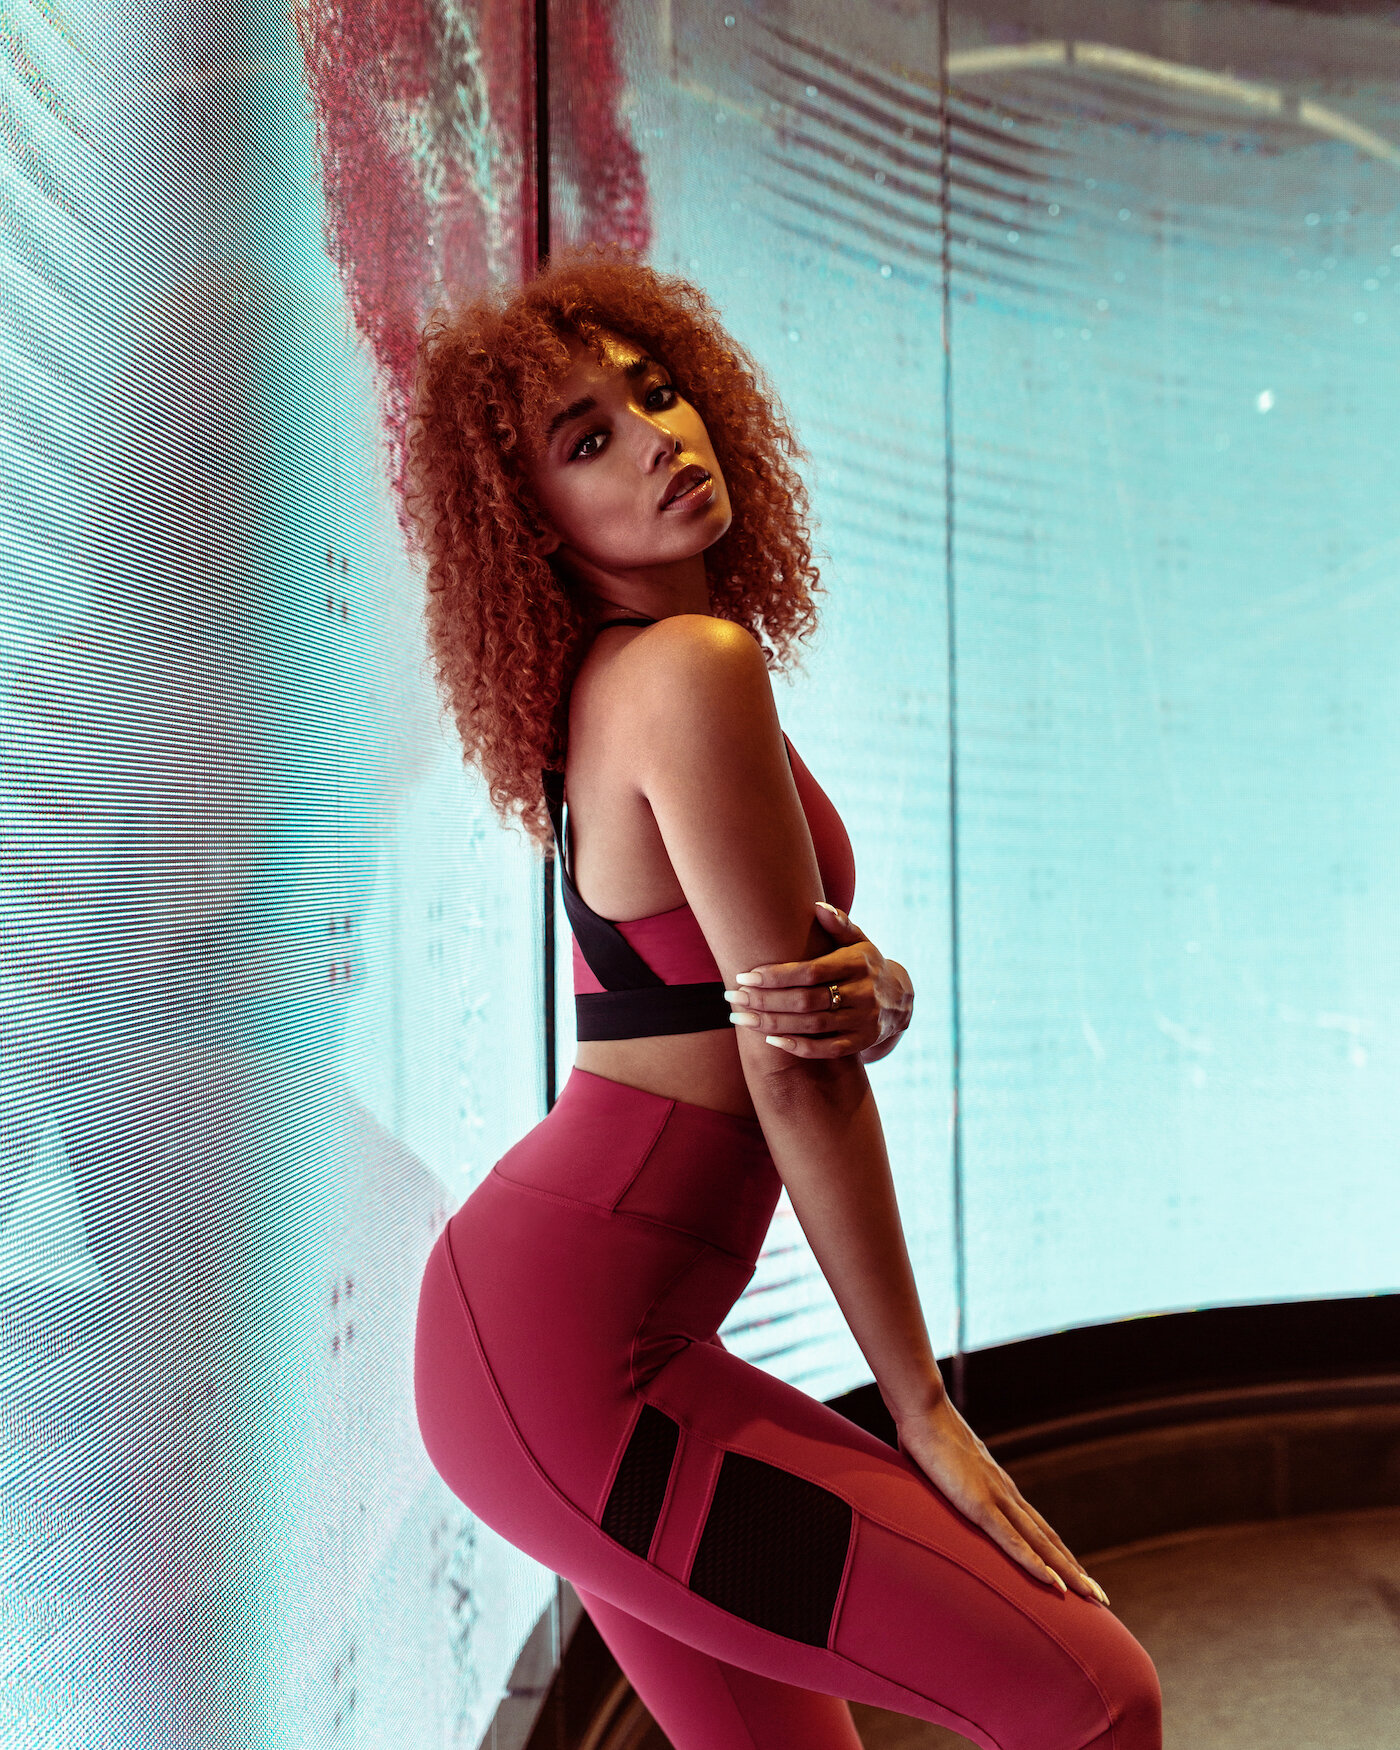
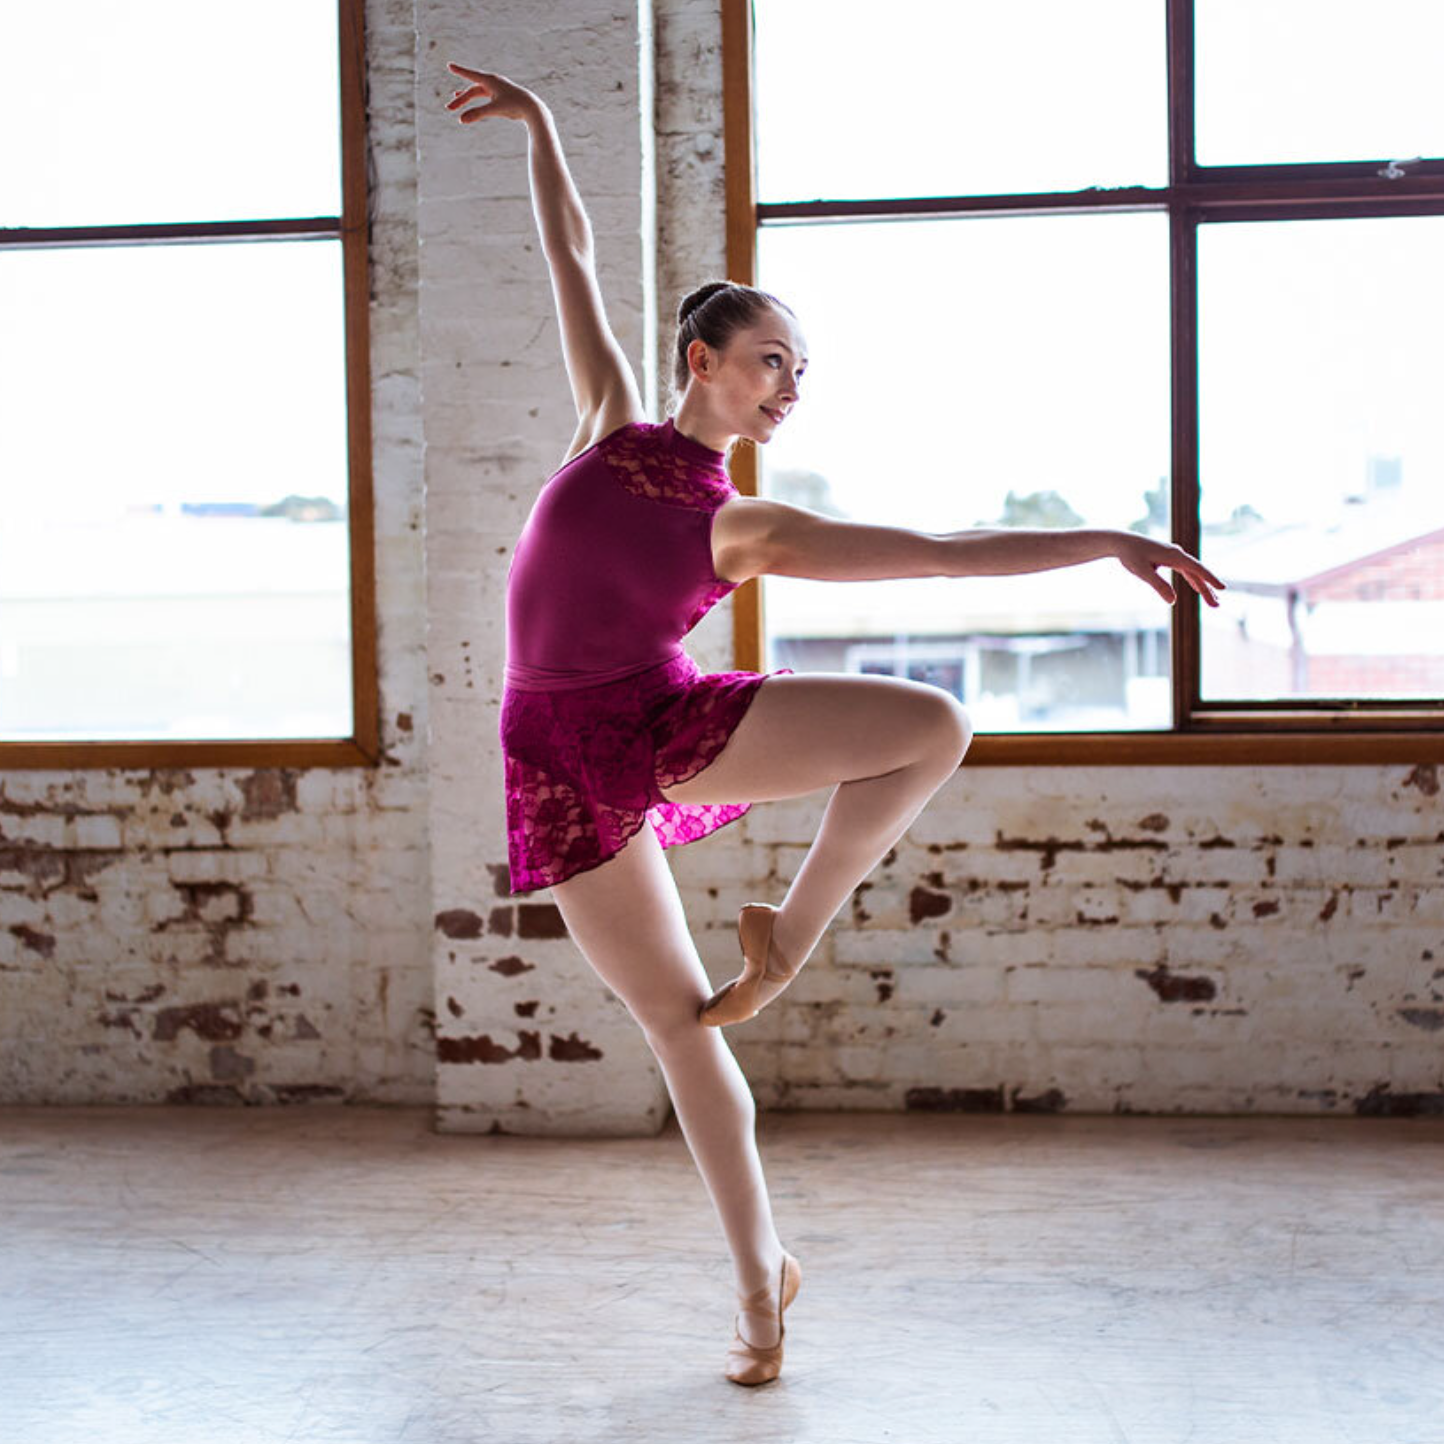
Tip 5. Nail the outfit.
It’s not just the backdrop, or the pose, or the lighting that can have a major impact on how well your photo turns out. If you have a look at some of your favourite dance photos, you’ll notice what a huge difference the dancers outfit can make in either adding to or taking away from the overall beauty of the shot. Flowing skirts, striking designs, bold colours; these things can all play a big part in how a dance shot ends up looking. So planning an outfit should be one of the first steps you go through when deciding on a shoot. Baggy clothes can be great for a more urban/moody shoot, but they can also ruin the lines and shape of a great pose. A really bright, bold leotard can absolutely make a photo with a cleaner background, but it could also easily overwhelm if there’s too much going on already. Similarly old, dirty shoes that are falling to bits can end up being the unintentional star of your photo, so always try to have clean, beautiful outfits (whatever the style you’re going for) and pick a dance outfit that enhances your shot. Some of my all-time favourite choices are the sophisticated elegance of a high neck leotard, a long free flowing skirt to give you something to play and create shapes with, and any fabrics or patterns that add an extra element of beauty to your photo, take the exquisite Velvet Collection, which is a current favourite for the way it shimmers and catches the light with every movement. Superb! Keep an eye on Energetiks brand New Arrivals if you’re wanting a stunning, unique outfit to really set your photo apart.
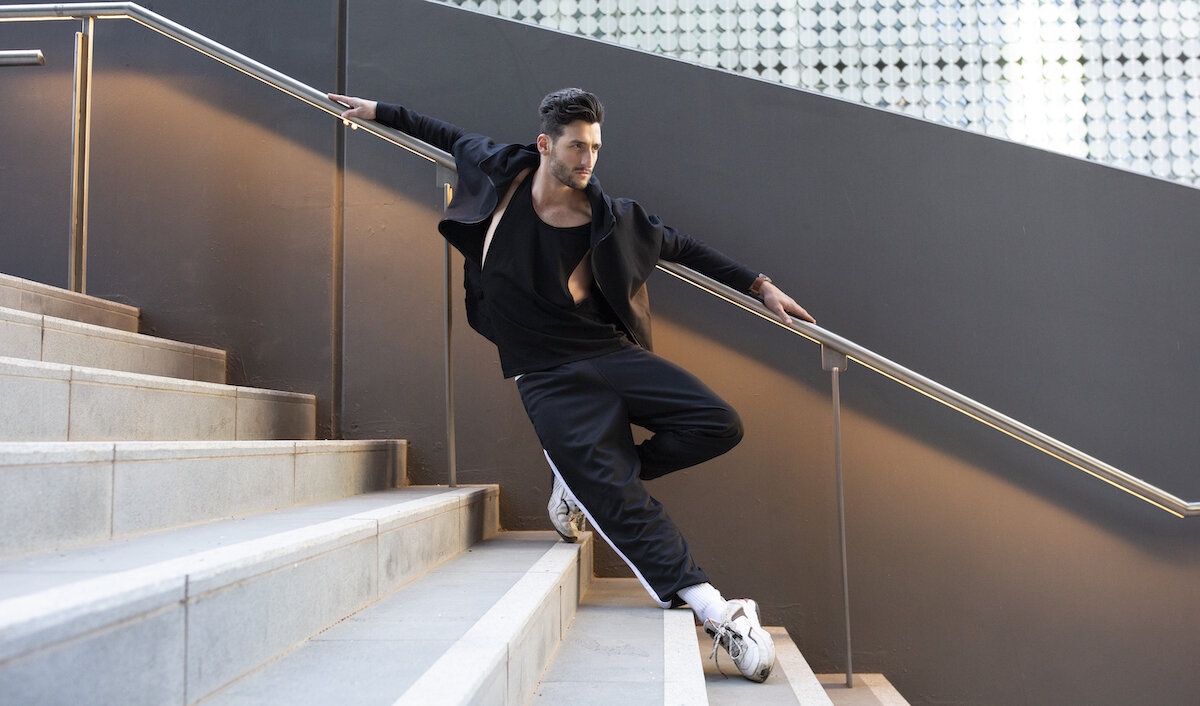
Tip 6. Angles are everything.
We all know the old hold-the-phone-above-your-head and add a little chin tilt trick that works a treat for selfies. Just as selfies have tried and true angles, so too do dance photos and they’re not always the same as other types of photography. Think about what you’re trying to accentuate and enhance with a dance photo: often the aim is longer legs, higher jumps and the appearance of power. You want to look in control and full of poise, and the best way to achieve this in your subject is to place the camera closer to the ground, below eye level. Don’t be afraid to crouch or lay down to get the optimal result (or, you know, put your iPhone on the floor if you’re shooting solo!), shooting this way will often give your subject a more powerful appearance, just as shooting above them can create the opposite effect. But as with everything, rules are made to be broken, so don’t feel like you have to take my word for it, just make sure you’re trying out multiple angles to see what one gives you the effect you’re after and don’t just take every photo at boring old eye level (yawn). Bonus tip: Dance is about the whole body, so full body shots are definitely a winner, but you can also get creative with closer in, cropped photos for some really interesting and unique results.

Kyra Dooley and Jack Hersee wearing the Viva Collection.
Tip 7. A little edit never hurt nobody.
So you’ve really done it: you nailed the pose, you mastered the lighting, you aced the background and the outfit is fire! Now what? Well you could just call it a day, upload, caption and post to insta… or you could go the extra mile and make some final creative tweaks that might just take your photo from a new fave to an all-time favourite. Yes, Instagram and other apps have handy inbuilt filters and basic editing tools that give you a few options to play with. But if you’d really like to have some more control over your image I would recommend having a look at as many editing apps and tools (either free or paid) that you’re able to test out. Lightroom and photoshop are a pro-photographers best friend, but if you don’t have the time or budget to sink into learning and owning software this pricey there are so many great, easy to use, affordable phone friendly tools out there. Consider the lightroom and photoshop apps, the free versions still have plenty of amazing features, or try other ones like Snapseed, VSCO, Carbon or Afterlight. What you do with an image after you’ve captured it can be just as transformative and enjoyable as the process of planning and taking it. Making small changes to the lighting, sharpness, saturation and hues in your image can elevate your photo to new heights and make the picture your own work of art.
It’s an amazing skill to understand not just the art of dance, but of good dance photography too, and it can be incredibly rewarding. So whether you’re wanting to be the photographer, the dancer or both for your next photoshoot, be patient, thoughtful and creative, and keep practising. Because all of the amazing skills, knowledge and bodily awareness that make you a great dancer will go a long way towards making you a great dance photographer too. Have fun and happy shooting!
Article and photography by Elly Ford
Read More:

6 Things Successful Dancers Do
Martha Berhane: Inaugural AOC Initiative Winner
Top 5 Dancewear Trends to Try in 2021

